This article describes the detailed step by step installation of Oracle RAC 12cR1 on Oracle Linux 6.5 using Virtual Box. In each separate section, a different configuration subject is handled. For example in one section the network configuration is done whereas in another the shared disks are configured. I tried to prepare a detailed fool-proof documentation that covers all the subjects required to install a RAC server without referring other documents and directing the user to other websites for some steps. We even install our own DNS server required for the scan listeners. Enjoy!
PRELIMINARY INFORMATION
Required Software
We’ll need the following software and tools for this tutorial. Beware of the fact that, you can just download and install any Oracle product without entering any activation keys. But they are not free! You must NOT use any Oracle products for any purpose without a licence. I am usually preparing documents using the real installations after changing the names and configuration details. When I use my own laptop for the installations, I immediately delete them after the installation is successful. The good news is that; there is a free version for the Oracle Database which is fully functional: Oracle Express Edition (XE). You can freely use XE for database curriculum and instruction.
Oracle Enterprise Linux 6.5Oracle Database Grid Infrastructure 12.1.0.2.0
Oracle Database 12.1.0.2.0
Oracle Virtual Box
Putty
Xming
The Architecture
After all the steps are applied, the architecture would be something like:
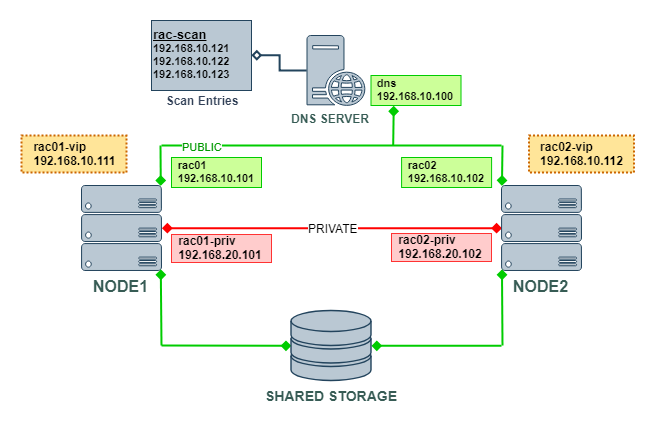
The Network Architecture
| Interface | Network | IP | Full Name | Name | Entry |
|---|---|---|---|---|---|
| eth0 | public | 192.168.10.101 | rac01.testserver.com | rac01 | Hosts |
| eth0 | public | 192.168.10.102 | rac02.testserver.com | rac02 | Hosts |
| eth0 | virtual | 192.168.10.111 | rac01-vip.testserver.com | rac01-vip | Hosts |
| eth0 | virtual | 192.168.10.112 | rac02-vip.testserver.com | rac02-vip | Hosts |
| eth0 | scan | 192.168.10.121 | rac-scan.testserver.com | rac-scan | DNS |
| eth0 | scan | 192.168.10.122 | rac-scan.testserver.com | rac-scan | DNS |
| eth0 | scan | 192.168.10.123 | rac-scan.testserver.com | rac-scan | DNS |
| eth1 | private | 192.168.20.101 | rac01-priv.testserver.com | rac01-priv | Hosts |
| eth1 | private | 192.168.20.102 | rac02-priv.testserver.com | rac02-priv | Hosts |
| eth0 | dns | 192.168.10.100 | dns.testserver.com | dns | Hosts |
DNS SERVER INSTALLATION
This section is about basic DNS configuration necessary to use the Single Client Access Name (SCAN). I am not a DNS nor Linux exper so the configuration here might not be the more appropriate one, and you may require to read some other sources for only DNS.
Start the Installation

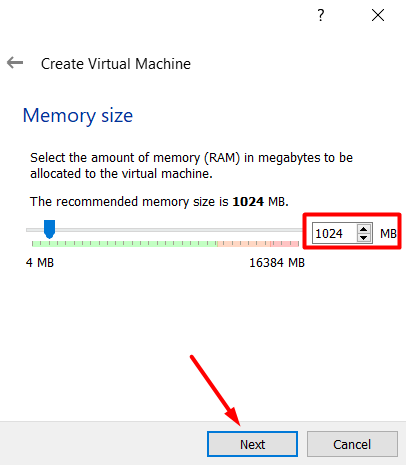
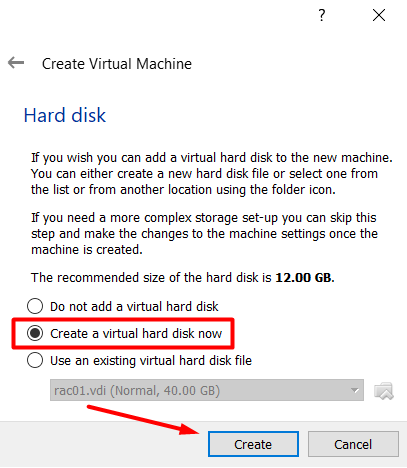
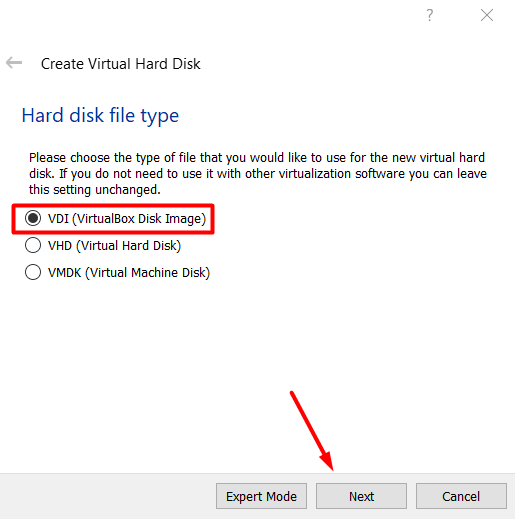
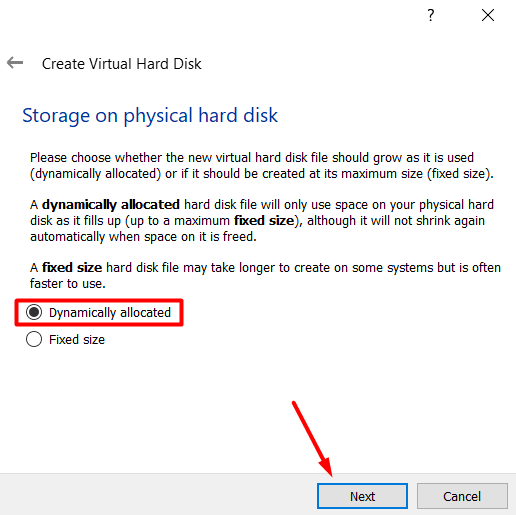
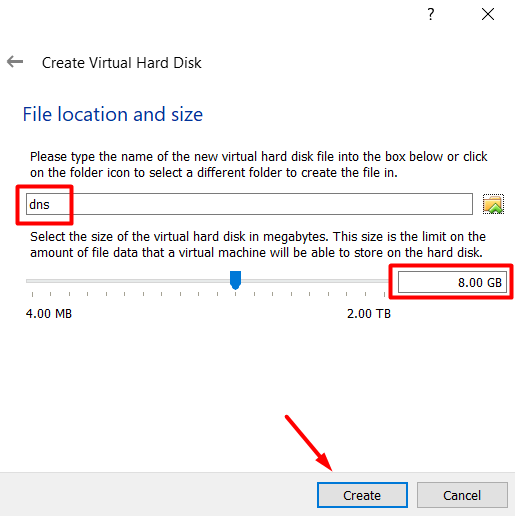
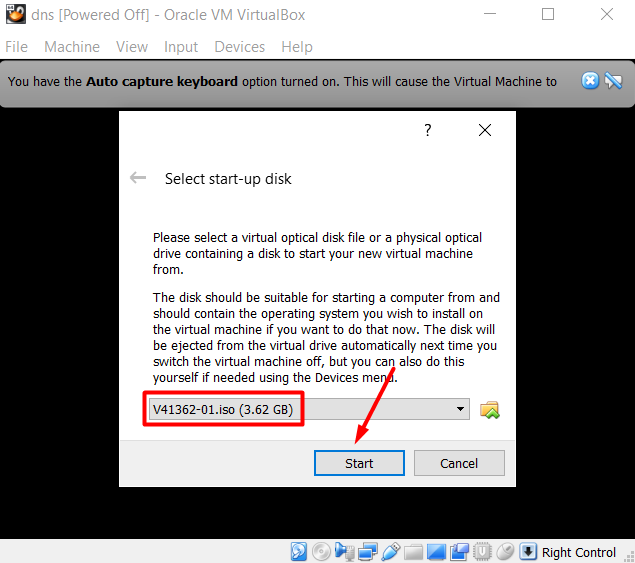
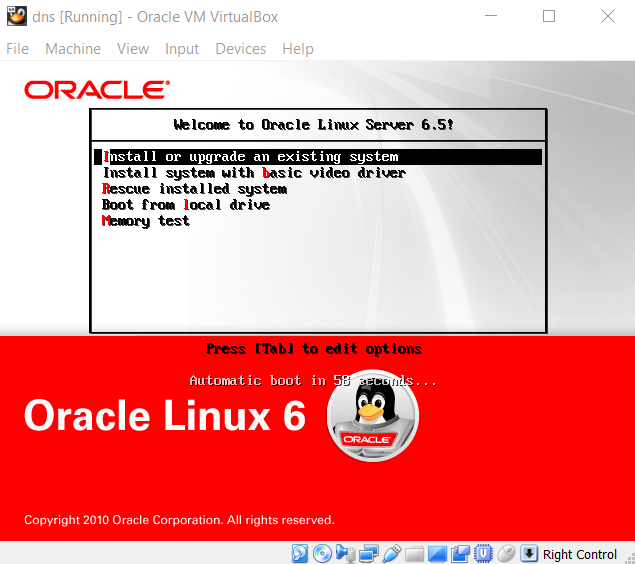
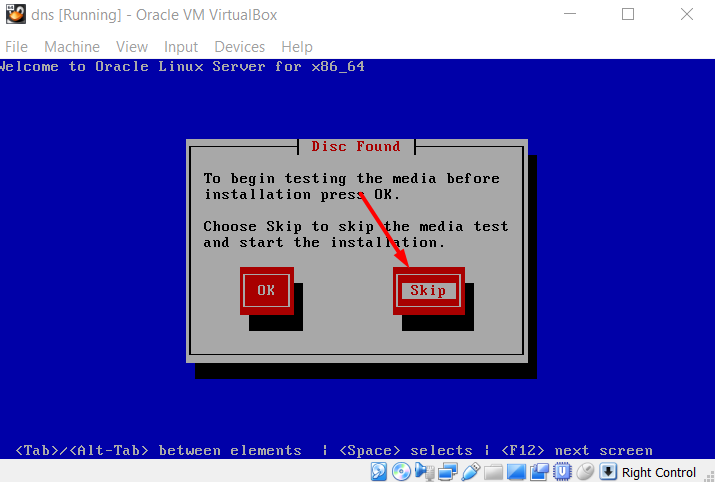


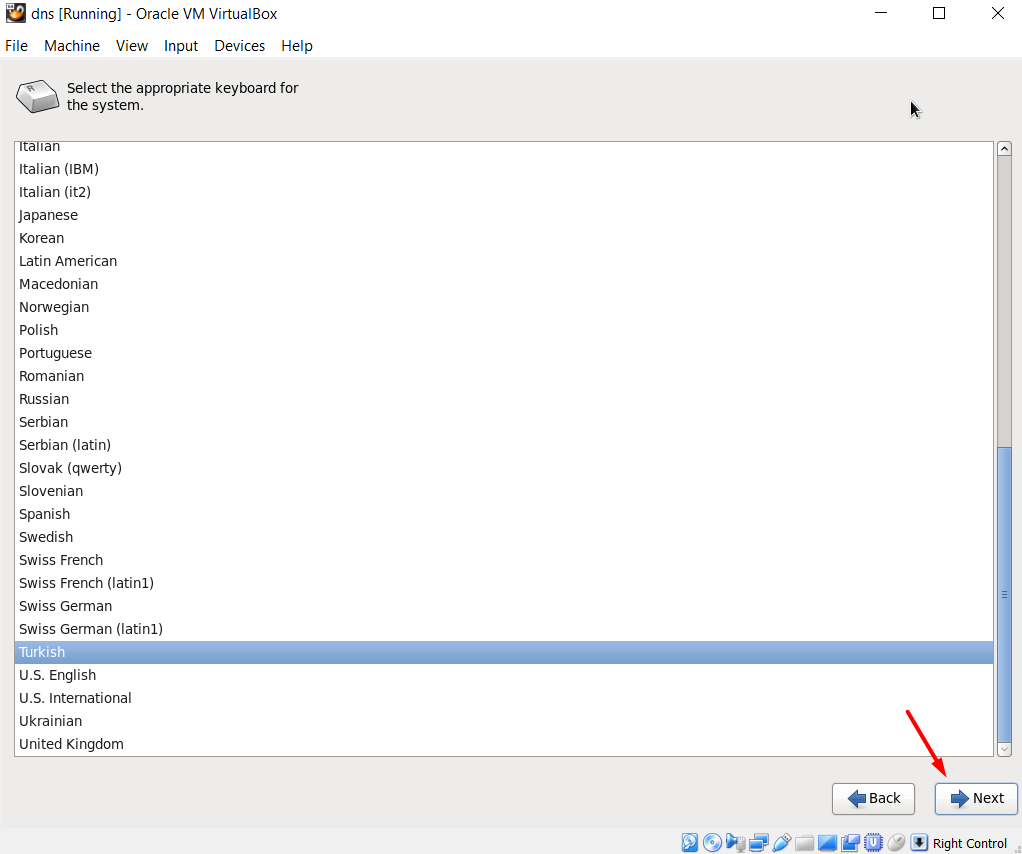

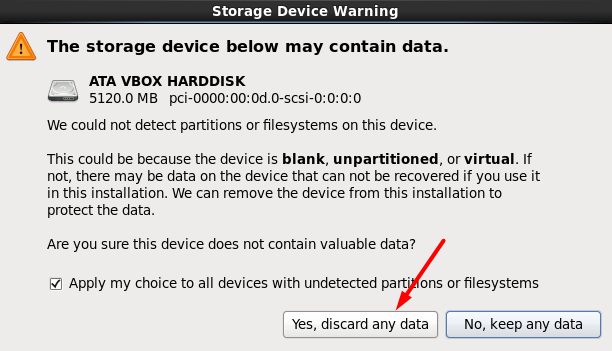


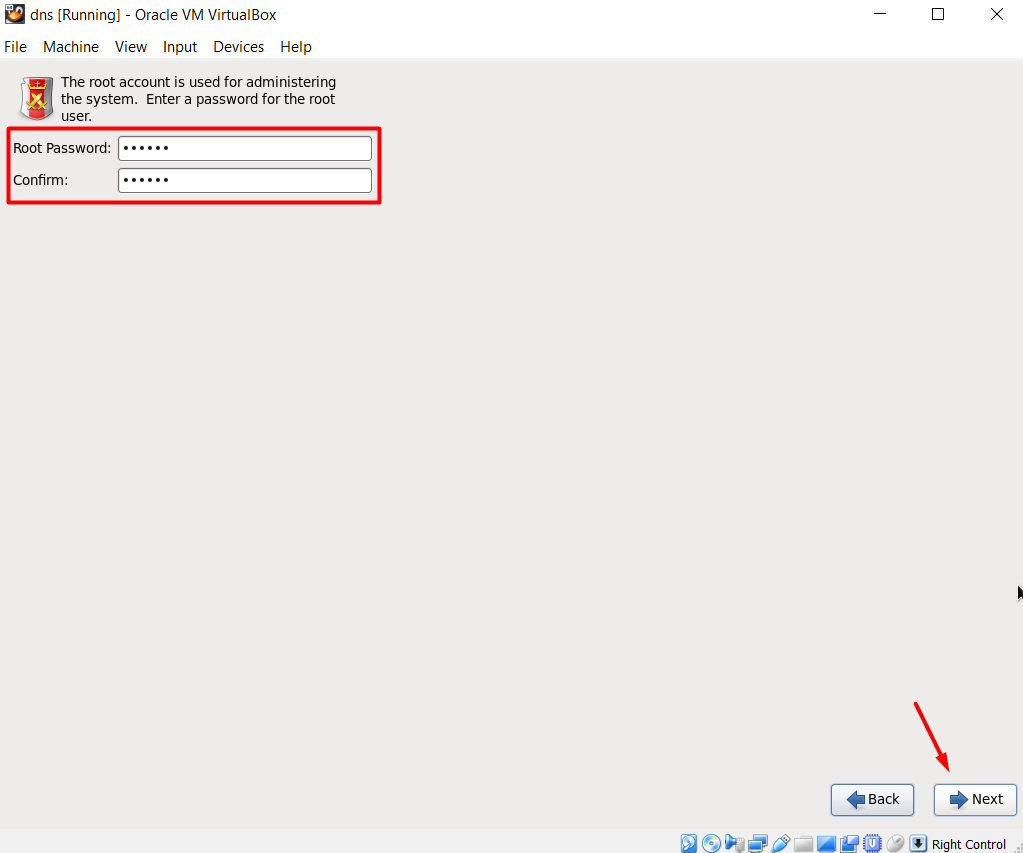

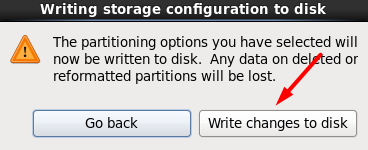
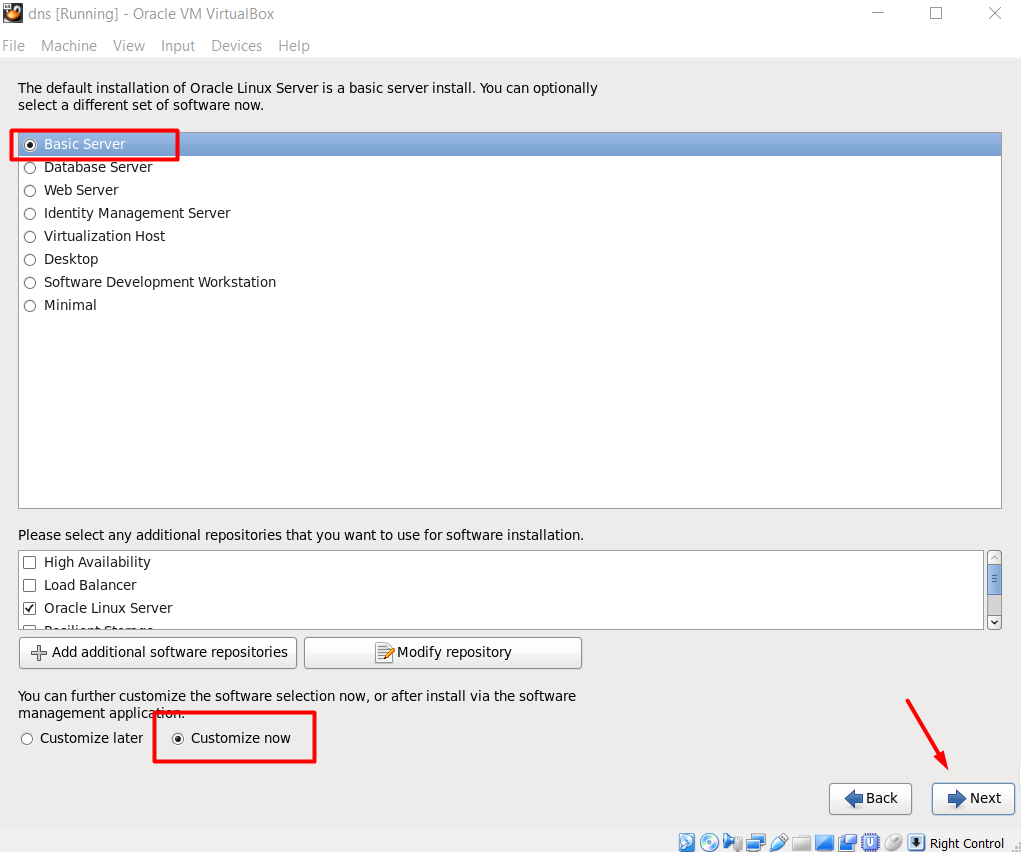
The following packages should be installed:
Base System > Base
Base System > Compatibility libraries
Base System > Hardware monitoring utilities
Base System > Large Systems Performance
Base System > Network file system client
Base System > Performance Tools
Base System > Perl Support
Servers > Server Platform
Servers > System administration tools
Servers > Network Infrastructure Server > bind* (everything related with bind)
Desktops > Desktop
Desktops > Desktop Platform
Desktops > Fonts
Desktops > General Purpose Desktop
Desktops > Graphical Administration Tools
Desktops > Input Methods
Desktops > X Window System
Applications > Internet Browser
Development > Additional Development
Development > Development Tools
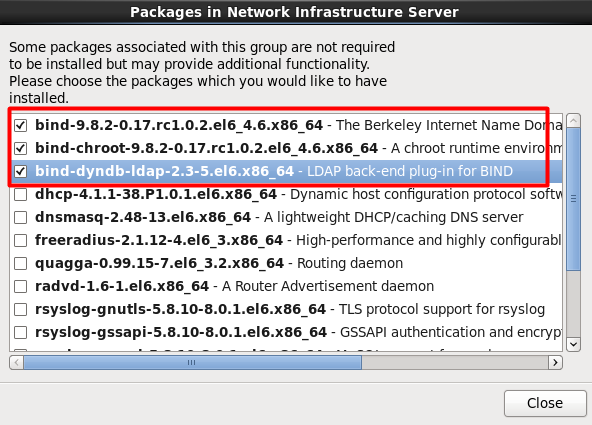

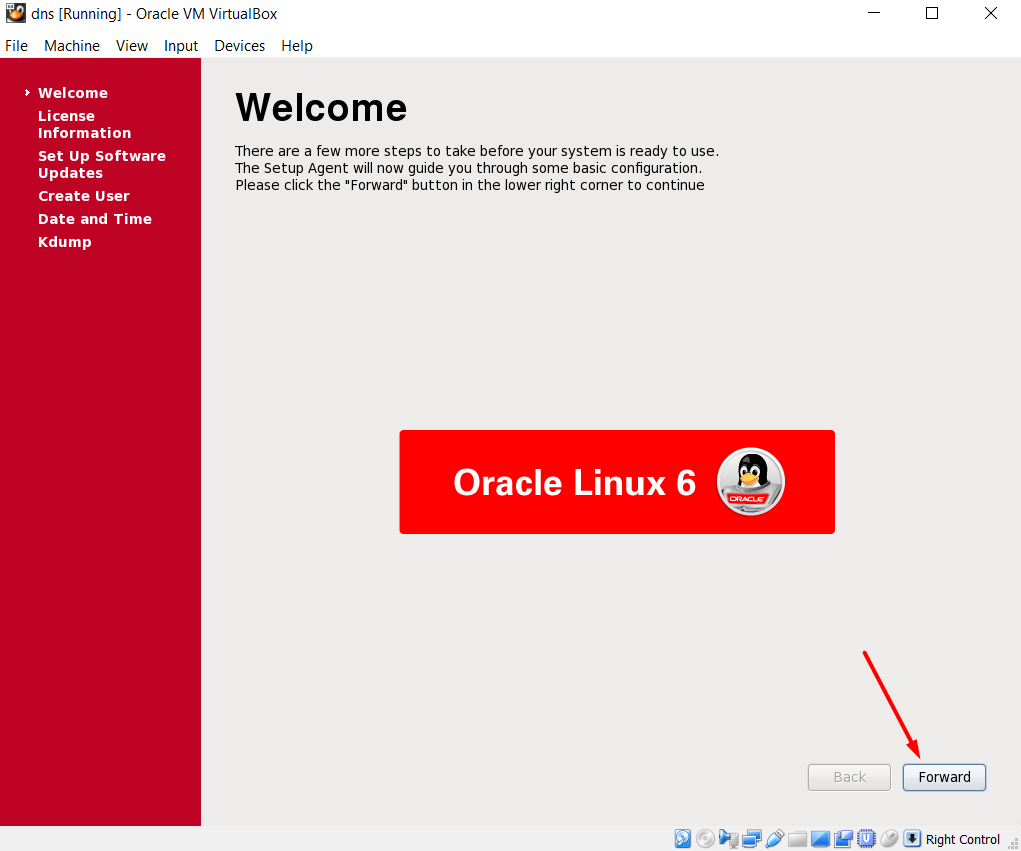
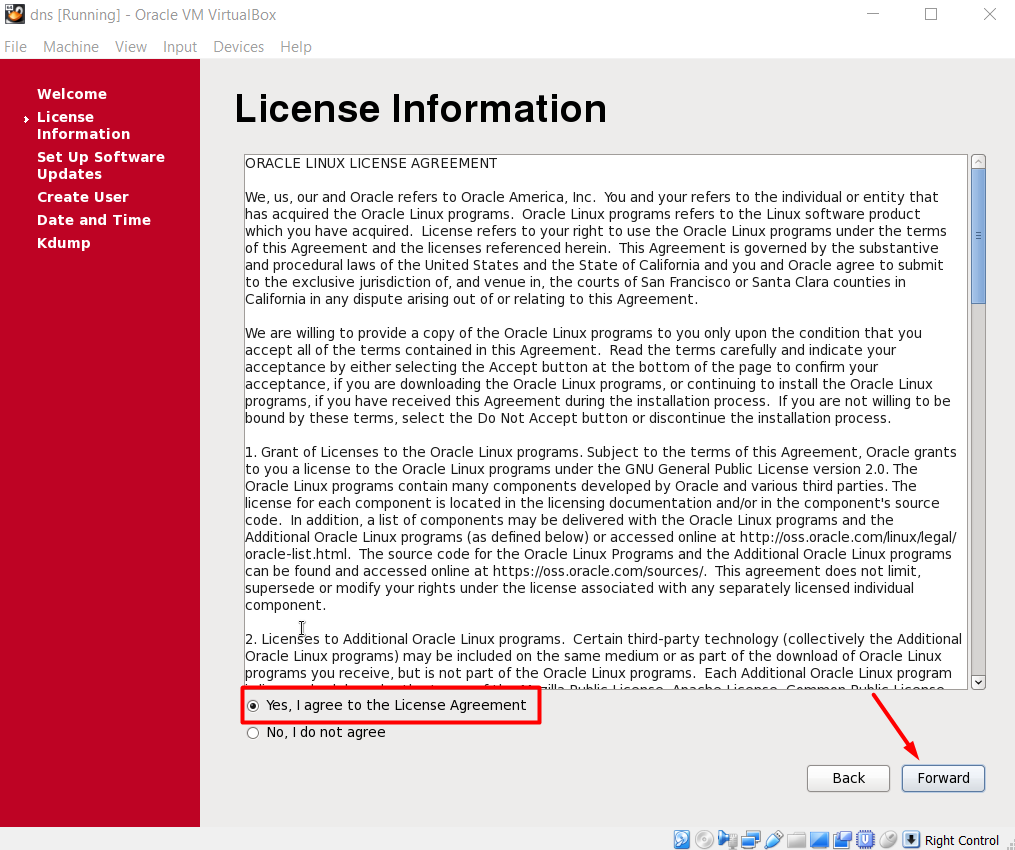
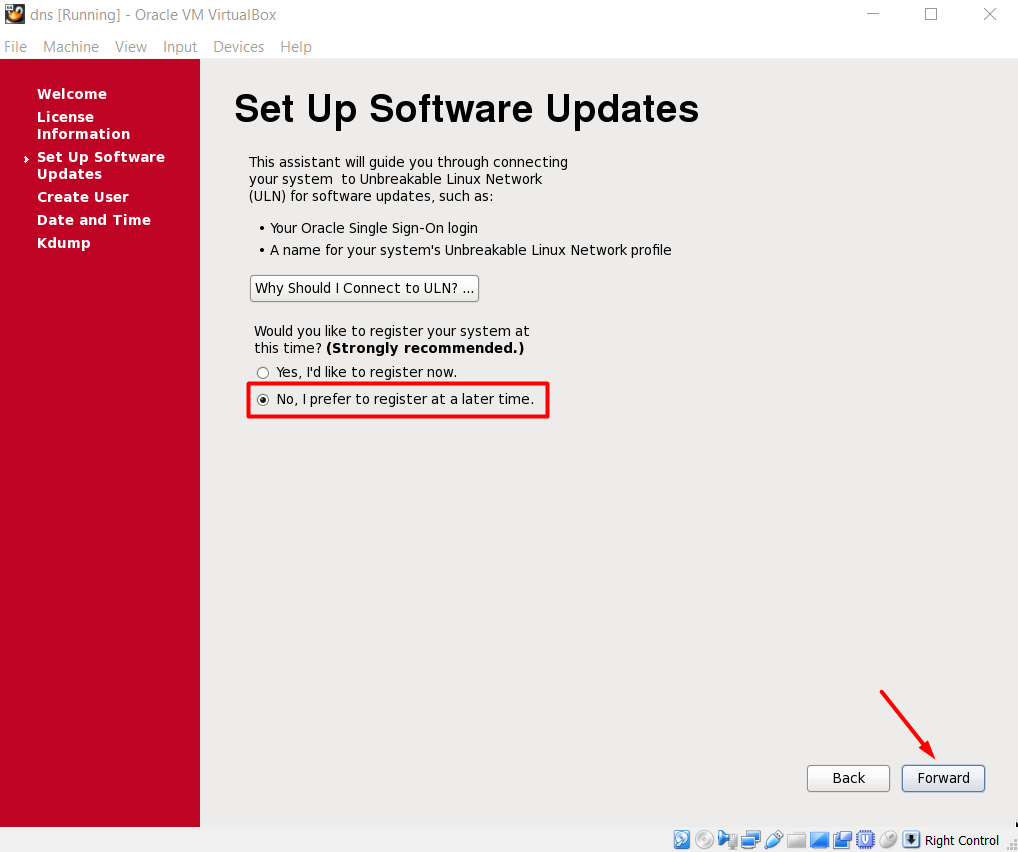
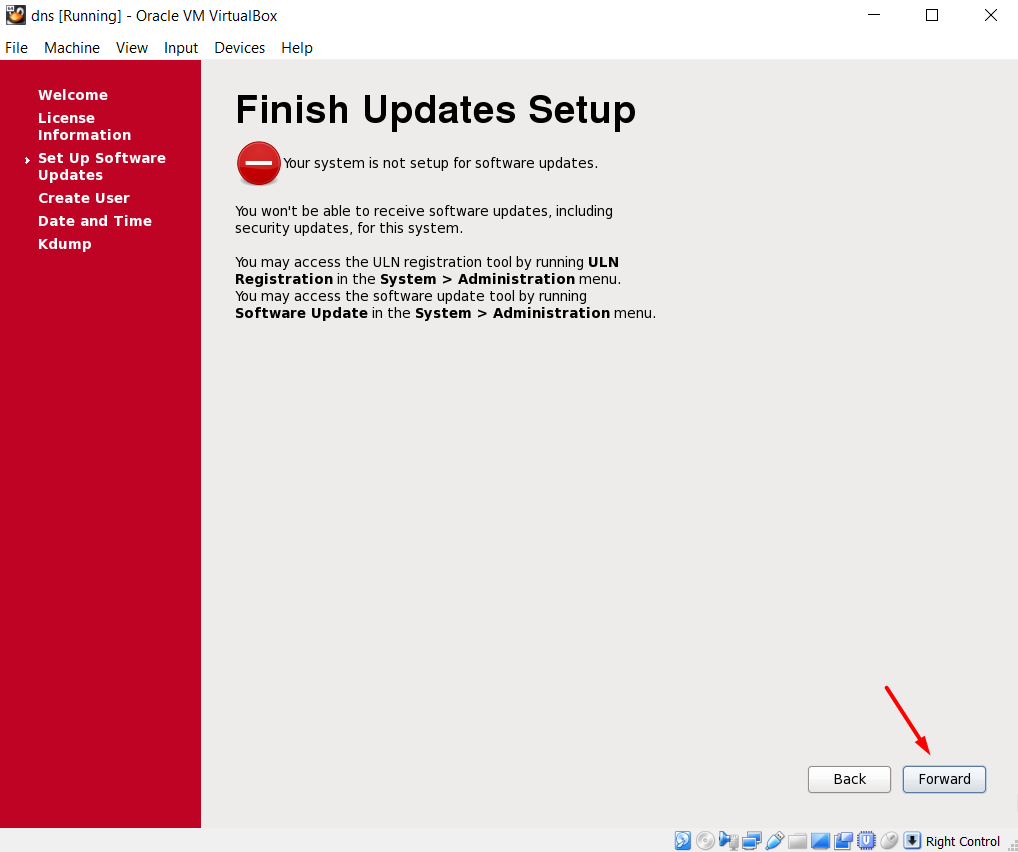
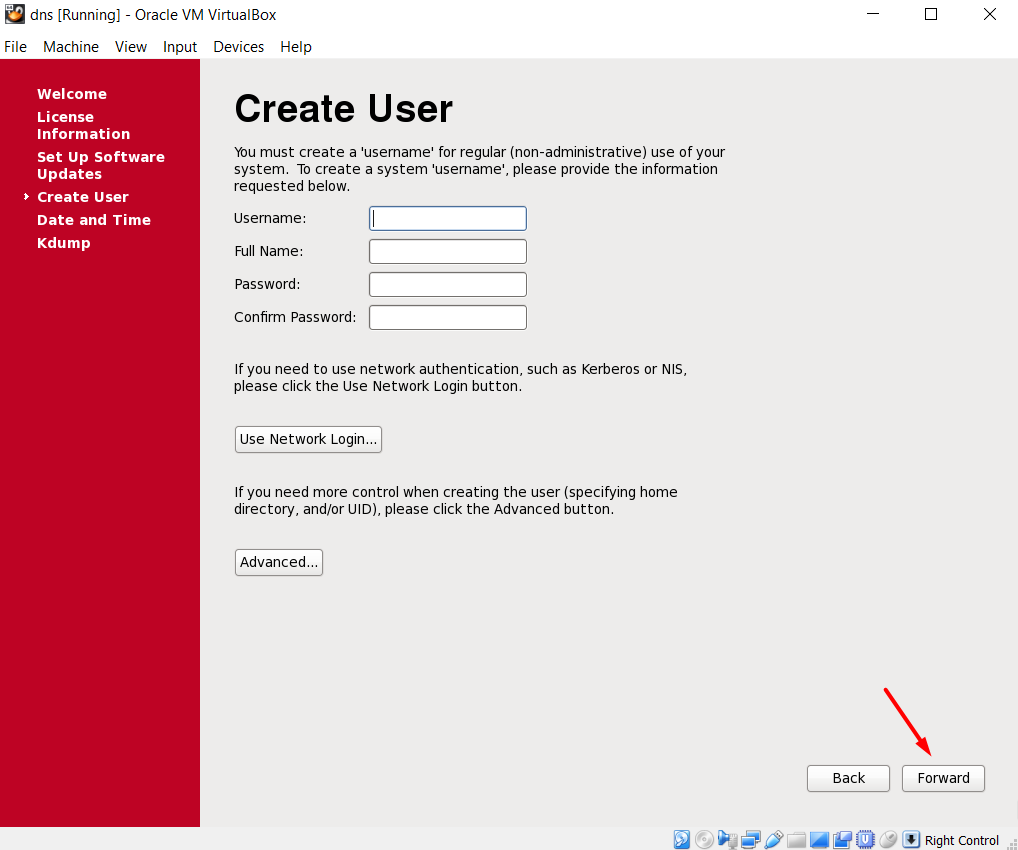
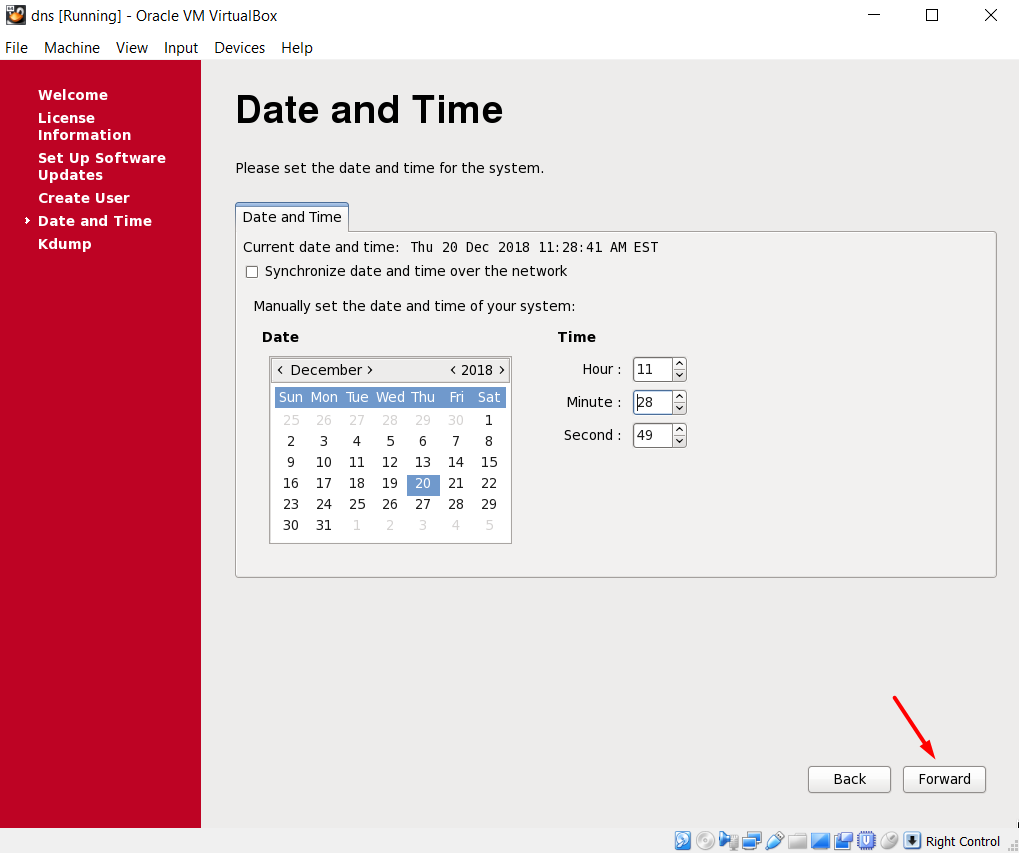
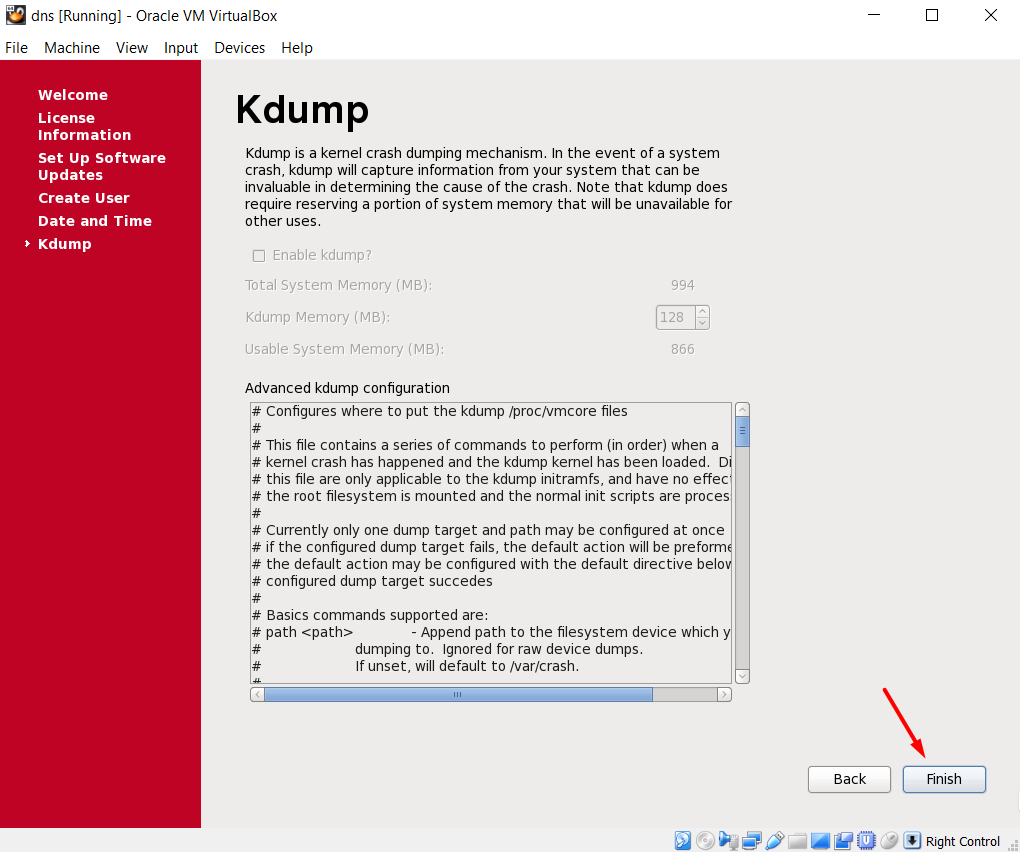
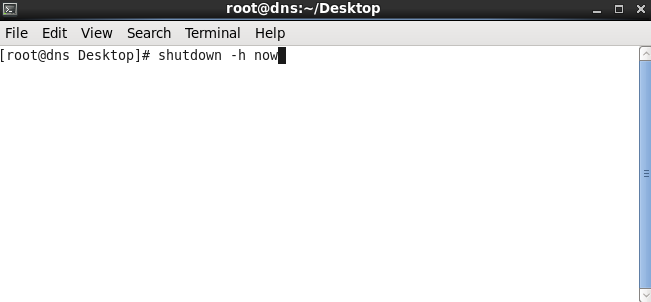
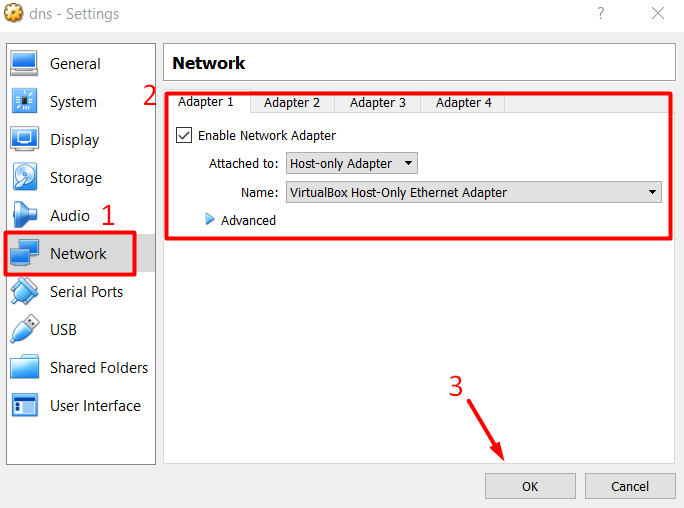

Edit the /etc/hosts file
[root@dns ~]> cat /etc/hosts

127.0.0.1       localhost localhost.localdomain localhost4 localhost4.localdomain4
192.168.10.100  dns.testserver.com      dns
Stop & Disable Firewall
[root]> service iptables stop
[root]> chkconfig iptables off
Disable SELINUX
[root]> cat /etc/selinux/config

# This file controls the state of SELinux on the system.
# SELINUX= can take one of these three values:
#     enforcing - SELinux security policy is enforced.
#     permissive - SELinux prints warnings instead of enforcing.
#     disabled - No SELinux policy is loaded.
SELINUX=disabled
# SELINUXTYPE= can take one of these two values:
#     targeted - Targeted processes are protected,
#     mls - Multi Level Security protection.
SELINUXTYPE=targeted
Edit /etc/named.conf
[root]> cat /etc/named.conf

zone "." in {
	type hint;
	file "/dev/null";
};
zone "testserver.com" IN
{
        type master;
        allow-update { none; };
        file "testserver.com.zone";
};
zone "10.168.192.in-addr.arpa." IN
{
        type master;
        file "10.168.192.zone";
        allow-update { none; };
};
options {
directory "/var/named";
};
Create /var/named/testserver.com.zone file
[root]> cat /var/named/testserver.com.zone

$TTL 86400
@                       IN     SOA    localhost     root.localhost (
                                                        42      ; serial
                                                        3H      ; refresh
                                                        15M     ; retry
                                                        1W      ; expiry
                                                        86400 ) ; minimum
                        IN     NS   localhost
localhost		IN      A   127.0.0.1
rac01			IN      A   192.168.10.101
rac02			IN      A   192.168.10.102
rac01-priv		IN      A   192.168.20.101
rac02-priv		IN      A   192.168.20.102
rac01-vip		IN      A   192.168.10.111
rac02-vip		IN      A   192.168.10.112
rac-scan		IN      A   192.168.10.121
rac-scan		IN      A   192.168.10.122
rac-scan		IN      A   192.168.10.123
Create /var/named/10.168.192.zone file
[root]> cat /var/named/10.168.192.zone

$TTL 1H
@                       IN     SOA    dns.testserver.com     root.dns.testserver.com. (
                                                        2
                                                        3H
                                                        1H
                                                        1W
                                                        1H )
10.168.192.in-addr.arpa.       IN      NS      dns.testserver.com.

101     IN  PTR  rac01.testserver.com.
102     IN  PTR  rac02.testserver.com.
111     IN  PTR  rac01-vip.testserver.com.
112     IN  PTR  rac02-vip.testserver.com.
121     IN  PTR  rac-scan.testserver.com.
122     IN  PTR  rac-scan.testserver.com.
123     IN  PTR  rac-scan.testserver.com.
Edit /etc/resolv.conf file
[root]> cat /etc/resolv.conf

search testserver.com
nameserver 192.168.10.100
Edit network manager file to prevent it overwrite the resolv.conf file.
[root]> service NetworkManager stop
[root]> chkconfig NetworkManager off
Copy zone files
[root]> cp /etc/named.conf /var/named/chroot/etc/
[root]> cp /var/named/testserver.com.zone /var/named/chroot/var/named
[root]> cp /var/named/10.168.192.zone /var/named/chroot/var/named
Fix the ownership
[root]> chown named:named /var/named/chroot/etc -R
[root]> chown named:named /var/named/chroot/var/named -R
Start the named service and enable it to start on startup
[root]> service named start
[root]> chkconfig named on
RAC NODE 1 OS INSTALLATION
Now that our DNS server is ready, we can start the installation of the OS for the main server 1st node. After we install the OS and configure everything for the RAC on this server, we will clone it and create the second node out of this installation. So, let’s start the installation:


The following packages should be installed:
Base System > Base
Base System > Compatibility libraries
Base System > Hardware monitoring utilities
Base System > Large Systems Performance
Base System > Network file system client
Base System > Performance Tools
Base System > Perl Support
Servers > Server Platform
Servers > System administration tools
Desktops > Desktop
Desktops > Desktop Platform
Desktops > Fonts
Desktops > General Purpose Desktop
Desktops > Graphical Administration Tools
Desktops > Input Methods
Desktops > X Window System
Applications > Internet Browser
Development > Additional Development
Development > Development Tools


Configure the Network Properties on the Linux Server
After starting the server, configure the following network properties on the server:
Hostname
Edit the /etc/sysconfig/network file and set the hostname to rac01.testserver.com. (This should already be set)
[root@rac01]> cat /etc/sysconfig/network

NETWORKING=yes
HOSTNAME=rac01.testserver.com
NOZEROCONF=yes
Hosts File
Edit /etc/hosts file. The scan ip entries are there just for info. They are commented.
 [root@rac01 Desktop]> cat /etc/hosts

127.0.0.1   localhost localhost.localdomain localhost4 localhost4.localdomain4

##########################################################
##################  RAC Configuration  ###################
##########################################################

#Public
192.168.10.101    rac01.testserver.com       rac01
192.168.10.102    rac02.testserver.com       rac02

#Private
192.168.20.101    rac01-priv.testserver.com  rac01-vip
192.168.20.102    rac02-priv.testserver.com  rac02-vip

#Virtual
192.168.10.111    rac01-vip.testserver.com   rac01-vip
192.168.10.112    rac02-vip.testserver.com   rac02-vip

#Scan
#192.168.10.121   rac-scan.testserver.com    rac-scan
#192.168.10.122   rac-scan.testserver.com    rac-scan
#192.168.10.123   rac-scan.testserver.com    rac-scan
DNS File
Edit /etc/resolv.conf to point to the DNS server for name resolution of scan IPs.
[root@rac01]> cat /etc/resolv.conf

nameserver 192.168.10.100
search testserver.com
Edit network manager file to prevent it overwrite the resolv.conf file
[root@rac01]> service NetworkManager stop
[root@rac01]> chkconfig NetworkManager off
ETH0
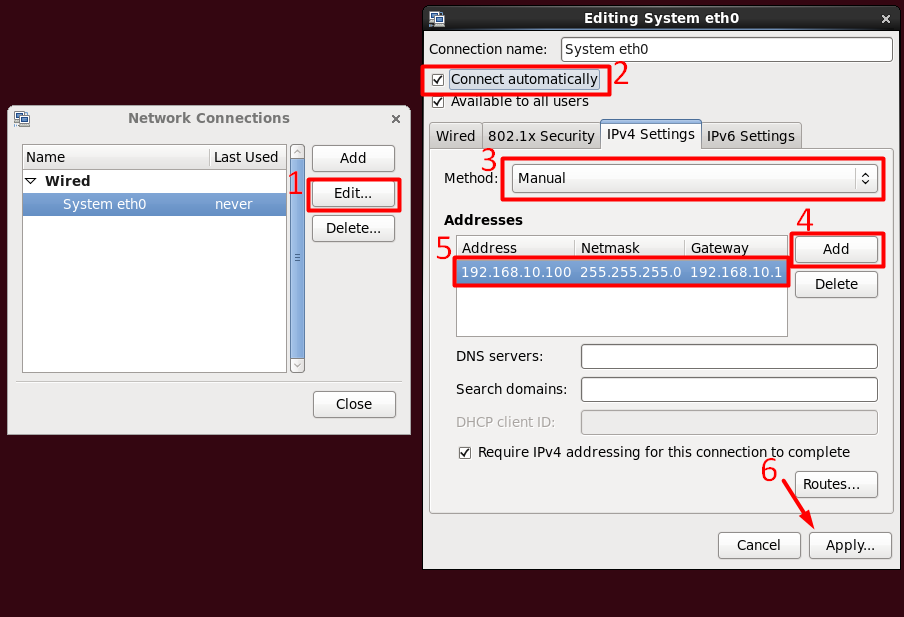
Edit the configuration script for the relevant interface under the /etc/sysconfig/network-scripts/ path. If named directly after the interface eth0 then this would be called ifcfg-eth0, however other names are possible (including ifcfg-Auto_eth0 if using the Gnome Network Manager). If no configuration script exists then you will need to create one. I prefer configuring using the GUI at this point:

If you want to configure manually, you need to edit the relevant eth configuration file:
Edit /etc/sysconfig/network-scripts/ifcfg-Auto_eth0
[root@rac01 network-scripts]> cat /etc/sysconfig/network-scripts/ifcfg-Auto_eth0
TYPE=Ethernet
BOOTPROTO=none
IPADDR=192.168.10.101
PREFIX=24
GATEWAY=192.168.10.1
DEFROUTE=yes
IPV4_FAILURE_FATAL=yes
IPV6INIT=no
NAME="Auto eth0"
ONBOOT=yes
HWADDR=08:00:27:52:AC:B2
ETH1
Again, while configuring the eth1, either use the GUI or edit the config file as below:
Edit /etc/sysconfig/network-scripts/ifcfg-Auto_eth1
TYPE=Ethernet
BOOTPROTO=none
IPADDR=192.168.20.101
PREFIX=24
GATEWAY=192.168.20.1
DEFROUTE=yes
IPV4_FAILURE_FATAL=yes
IPV6INIT=no
NAME="Auto eth1"
ONBOOT=yes
HWADDR=08:00:27:22:44:84
HWADDR address in the above configuration is the MAC address of the virtual adapter:

Restart the network
[root@rac01]> service network restart
Check to see whether the IPs are correct. Even reboot the server and see whether the IP configuration is consistent.
root@rac01 network-scripts]> ifconfig

eth0      Link encap:Ethernet  HWaddr 08:00:27:52:AC:B2
          inet addr:192.168.10.101  Bcast:192.168.10.255  Mask:255.255.255.0
          inet6 addr: fe80::a00:27ff:fe52:acb2/64 Scope:Link
          UP BROADCAST RUNNING MULTICAST  MTU:1500  Metric:1
          RX packets:346 errors:0 dropped:0 overruns:0 frame:0
          TX packets:380 errors:0 dropped:0 overruns:0 carrier:0
          collisions:0 txqueuelen:1000
          RX bytes:29276 (28.5 KiB)  TX bytes:56245 (54.9 KiB)

eth1      Link encap:Ethernet  HWaddr 08:00:27:22:44:84
          inet addr:192.168.20.101  Bcast:192.168.20.255  Mask:255.255.255.0
          inet6 addr: fe80::a00:27ff:fe22:4484/64 Scope:Link
          UP BROADCAST RUNNING MULTICAST  MTU:1500  Metric:1
          RX packets:4 errors:0 dropped:0 overruns:0 frame:0
          TX packets:13 errors:0 dropped:0 overruns:0 carrier:0
          collisions:0 txqueuelen:1000
          RX bytes:1002 (1002.0 b)  TX bytes:938 (938.0 b)

lo        Link encap:Local Loopback
          inet addr:127.0.0.1  Mask:255.0.0.0
          inet6 addr: ::1/128 Scope:Host
          UP LOOPBACK RUNNING  MTU:65536  Metric:1
          RX packets:64 errors:0 dropped:0 overruns:0 frame:0
          TX packets:64 errors:0 dropped:0 overruns:0 carrier:0
          collisions:0 txqueuelen:0
          RX bytes:5068 (4.9 KiB)  TX bytes:5068 (4.9 KiB)
RAC NODE 1 OS CONFIGURATION
Install RPMs
Let’s create our own Yum repository and install the RPMs using that. Yum can connect to internet repository but the servers are not always connected to the internet so I find this method more convenient.
Mount the Linux iso file as a CD/DVD

You should see the image file as below:
[root@rac01 media]> pwd
/media
[root@rac01 media]> ll
total 6
drwxr-xr-x. 12 root root 6144 Nov 26  2013 OL6.5 x86_64 Disc 1 20131125
Create a link for the Yum repository
[root@rac01]> mkdir -p /linuxdvd
[root@rac01]> ln -s /media/OL6.5\ x86_64\ Disc\ 1\ 20131125/Server /linuxdvd
Edit the yum repository file
[root@rac01 linuxdvd]> cat /etc/yum.repos.d/dvd.repo

[oel6.5]
name=Linux 6.5 DVD
baseurl=file:///linuxdvd/Server
gpgcheck=0
enabled=1
Check the repository
[root@rac01 yum.repos.d]> yum repolist

Loaded plugins: refresh-packagekit, security
repo id   repo name                 status
oel6.5    Linux 6.5 DVD             3,669
repolist: 3,669
Install the RPMs manually using the Yum and the local repository
yum install binutils -y
yum install compat-libcap1 -y
yum install compat-libstdc++-33 -y
yum install compat-libstdc++-33.i686 -y
yum install glibc -y
yum install glibc.i686 -y
yum install glibc-devel -y
yum install glibc-devel.i686 -y
yum install ksh -y
yum install libaio -y
yum install libaio.i686 -y
yum install libaio-devel -y
yum install libaio-devel.i686 -y
yum install libX11 -y
yum install libX11.i686 -y
yum install libXau -y
yum install libXau.i686 -y
yum install libXi -y
yum install libXi.i686 -y
yum install libXtst -y
yum install libXtst.i686 -y
yum install libgcc -y
yum install libgcc.i686 -y
yum install libstdc++ -y
yum install libstdc++.i686 -y
yum install libstdc++-devel -y
yum install libstdc++-devel.i686 -y
yum install libxcb -y
yum install libxcb.i686 -y
yum install make -y
yum install nfs-utils -y
yum install net-tools -y
yum install smartmontools -y
yum install sysstat -y
yum install unixODBC -y
yum install unixODBC-devel -y
yum install e2fsprogs -y
yum install e2fsprogs-libs -y
yum install libs -y
yum install libxcb.i686 -y
yum install libxcb -y
yum install gcc -y
yum install gcc-c++ -y
yum install libXext -y
yum install libXext.i686 -y
yum install zlib-devel -y
yum install zlib-devel.i686 -y
Set Kernel Parameters
Add or amend the following lines to the “/etc/sysctl.conf” file. [ROOT]
fs.file-max = 6815744
kernel.sem = 250 32000 100 128
kernel.shmmni = 4096
kernel.shmall = 1073741824
kernel.shmmax = 4398046511104
net.core.rmem_default = 262144
net.core.rmem_max = 4194304
net.core.wmem_default = 262144
net.core.wmem_max = 1048576
fs.aio-max-nr = 1048576
net.ipv4.ip_local_port_range = 9000 65500
kernel.panic_on_oops = 1
Note: Issue the command “/sbin/sysctl -p” after changing kernel values.
Define Security Limits
Edit /etc/security/limits.conf for oracle and grid users. [ROOT]
oracle          hard    memlock 50000000
oracle          soft    memlock 50000000
oracle          soft    core    unlimited
oracle          hard    core    unlimited
oracle          soft    nproc   2047
oracle          hard    nproc   16384
oracle          soft    nofile  4096
oracle          hard    nofile  65536
oracle          soft    stack   10240
grid            hard    memlock 50000000
grid            soft    memlock 50000000
grid            soft    core    unlimited
grid            hard    core    unlimited
grid            soft    nproc   2047
grid            hard    nproc   16384
grid            soft    nofile  4096
grid            hard    nofile  65536
grid            soft    stack   10240
Add the following line to /etc/pam.d/login [ROOT]
session required pam_limits.so
Create Users & Groups
| USER | PRIMARY GROUP | SECONDARY GROUPS |
|---|---|---|
| grid | oinstall | asmadmin,asmdba,dba |
| oracle | oinstall | dba,asmdba |
Create groups and users [ROOT]
[root@rac01]> groupadd oinstall
[root@rac01]> groupadd asmadmin
[root@rac01]> groupadd asmdba
[root@rac01]> groupadd dba

[root@rac01]> useradd -g oinstall -G asmadmin,asmdba,dba grid
[root@rac01]> useradd -g oinstall -G dba,asmdba oracle
Note: Give passwords to the users after creation.
Create Directories
Create the directories [ROOT]
[root@rac01]> mkdir -p /u01/app/grid
[root@rac01]> mkdir -p /u01/app/12.1.0.2/grid
[root@rac01]> mkdir -p /u02/app/oracle
[root@rac01]> mkdir -p /u02/app/oracle/product/12.1.0.2/db_home

[root@rac01]> chown -R grid:oinstall /u01
[root@rac01]> chown -R oracle:oinstall /u02

[root@rac01]> chmod -R 775 /u01
[root@rac01]> chmod -R 775 /u02
Create the Profile Files
ORACLE
Edit the /home/oracle/.bash_profile file and append the following lines (with Oracle user)
# Oracle Settings

TMP=/tmp;export TMP
TMPDIR=$TMP;export TMPDIR

ORACLE_HOSTNAME=rac01.testserver.com;export ORACLE_HOSTNAME
ORACLE_UNQNAME=RAC;export ORACLE_UNQNAME
ORACLE_BASE=/u02/app/oracle;export ORACLE_BASE
ORACLE_HOME=/u02/app/oracle/product/12.1.0.2/db_home;export ORACLE_HOME
ORACLE_SID=RAC1;export ORACLE_SID
ORACLE_TERM=xterm;export ORACLE_TERM
BASE_PATH=/usr/sbin:$PATH;export BASE_PATH
PATH=$ORACLE_HOME/bin:$BASE_PATH;export PATH

LD_LIBRARY_PATH=$ORACLE_HOME/lib:/lib:/usr/lib; export LD_LIBRARY_PATH
CLASSPATH=$ORACLE_HOME/JRE:$ORACLE_HOME/jlib:$ORACLE_HOME/rdbms/jlib;export CLASSPATH
GRID
Edit the /home/oracle/.bash_profile file and append the following lines (with Grid user)
# Grid Settings

TMP=/tmp;export TMP
TMPDIR=$TMP;export TMPDIR

ORACLE_HOSTNAME=rac01.testserver.com;export ORACLE_HOSTNAME
ORACLE_UNQNAME=RAC;export ORACLE_UNQNAME
ORACLE_BASE=/u01/app/grid;export ORACLE_BASE
ORACLE_HOME=/u01/app/12.1.0.2/grid;export ORACLE_HOME
ORACLE_SID=+ASM1;export ORACLE_SID
ORACLE_TERM=xterm;export ORACLE_TERM
BASE_PATH=/usr/sbin:$PATH;export BASE_PATH
PATH=$ORACLE_HOME/bin:$BASE_PATH;export PATH

LD_LIBRARY_PATH=$ORACLE_HOME/lib:/lib:/usr/lib; export LD_LIBRARY_PATH
CLASSPATH=$ORACLE_HOME/JRE:$ORACLE_HOME/jlib:$ORACLE_HOME/rdbms/jlib;export CLASSPATH
Deconfigure NTP
[root@rac01]> service ntpd stop
[root@rac01]> chkconfig ntpd off
[root@rac01]> mv /etc/ntp.conf /etc/ntp.conf.orig
Setup Files
Create setup directory and copy setup files
[root@rac01 ~]> mkdir -p /setup
Copy the setup files using via an FTP tool

Edit the mod of the files and unzip the grid installaiton zips with the grid user:
[root@rac01 setup]> chmod -R 777 /setup
[root@rac01 setup]> chown grid:oinstall linuxamd64_12102_grid*
[root@rac01 setup]> chown oracle:oinstall linuxamd64_12102_database*

[root@rac01 setup]> su - grid
[grid@rac01 ~]$ cd /setup

[grid@rac01 setup]$ unzip linuxamd64_12102_grid_1of2.zip
[grid@rac01 setup]$ unzip linuxamd64_12102_grid_2of2.zip

[grid@rac01 setup]$ rm -rf linuxamd64_12102_grid*
Install the Cluster Verification RPMs
Go to the path /setup/grid/rpm and install the single rpm package residing in this path. [ROOT]
[root@rac01 ~]> cd /setup/grid/rpm/
[root@rac01 rpm]> rpm -Uvh cvuqdisk-1.0.9-1.rpm
RAC NODE 2 CREATION WITH CLONNING
Clone the Virtual Machine
Clone the Virtual Machine RAC01 to create RAC02 as follows:

Re-initializing is important here since both machines will work on the same network, we need to differentiate them by creating a new MAC address.


Fix the Network
Since our original server RAC01 has been cloned, all of the configurations were also cloned (except the MAC address -> we chose to reinitialize.) and this new server RAC02 is the exact copy of the original server. Therefore, we need to overwrite those configurations:
Change the hostname as seen below -> edit /etc/sysconfig/network [ROOT]
[root@rac01 Desktop]> cat /etc/sysconfig/network
NETWORKING=yes
HOSTNAME=rac02.testserver.com
NOZEROCONF=yes
Note down the new MAC addresses of the Node2 for adapter1 and adapter2


Edit the persistent rule file /etc/udev/rules.d/70-persistent-net.rules
[root@rac02 Desktop]> cat /etc/udev/rules.d/70-persistent-net.rules

# PCI device 0x8086:0x100e (e1000)
SUBSYSTEM=="net", ACTION=="add", DRIVERS=="?*", ATTR{address}=="08:00:27:95:87:b0", ATTR{type}=="1", KERNEL=="eth*", NAME="eth0"

# PCI device 0x8086:0x100e (e1000)
SUBSYSTEM=="net", ACTION=="add", DRIVERS=="?*", ATTR{address}=="08:00:27:3e:de:a8", ATTR{type}=="1", KERNEL=="eth*", NAME="eth1"
Edit the /etc/sysconfig/network-scripts/ifcfg-Auto_eth0 file
[root@rac02 network-scripts]> cat /etc/sysconfig/network-scripts/ifcfg-Auto_eth0

TYPE=Ethernet
BOOTPROTO=none
IPADDR=192.168.10.102
PREFIX=24
GATEWAY=192.168.10.1
DEFROUTE=yes
IPV4_FAILURE_FATAL=yes
IPV6INIT=no
NAME="Auto eth0"
UUID=f683918d-fcd5-444e-83cf-91152682bb28
ONBOOT=yes
HWADDR=08:00:27:95:87:B0
LAST_CONNECT=1545093190
Edit the /etc/sysconfig/network-scripts/ifcfg-Auto_eth1 file
[root@rac02 network-scripts]> cat /etc/sysconfig/network-scripts/ifcfg-Auto_eth1

TYPE=Ethernet
BOOTPROTO=none
IPADDR=192.168.20.102
PREFIX=24
GATEWAY=192.168.20.1
DEFROUTE=yes
IPV4_FAILURE_FATAL=yes
IPV6INIT=no
NAME="Auto eth1"
UUID=71607063-cfdd-4973-a46b-3d6ccb89a08e
ONBOOT=yes
HWADDR=08:00:27:3e:de:a8
LAST_CONNECT=1545076856
Reboot the server and check the Ethernet
[root@rac02 ~]> ifconfig

eth0      Link encap:Ethernet  HWaddr 08:00:27:95:87:B0
          inet addr:192.168.10.102  Bcast:192.168.10.255  Mask:255.255.255.0
          inet6 addr: fe80::a00:27ff:fe95:87b0/64 Scope:Link
          UP BROADCAST RUNNING MULTICAST  MTU:1500  Metric:1
          RX packets:98 errors:0 dropped:0 overruns:0 frame:0
          TX packets:80 errors:0 dropped:0 overruns:0 carrier:0
          collisions:0 txqueuelen:1000
          RX bytes:10207 (9.9 KiB)  TX bytes:10910 (10.6 KiB)

eth1      Link encap:Ethernet  HWaddr 08:00:27:3E:DE:A8
          inet addr:192.168.20.102  Bcast:192.168.20.255  Mask:255.255.255.0
          inet6 addr: fe80::a00:27ff:fe3e:dea8/64 Scope:Link
          UP BROADCAST RUNNING MULTICAST  MTU:1500  Metric:1
          RX packets:0 errors:0 dropped:0 overruns:0 frame:0
          TX packets:11 errors:0 dropped:0 overruns:0 carrier:0
          collisions:0 txqueuelen:1000
          RX bytes:0 (0.0 b)  TX bytes:818 (818.0 b)
Correct the Bash Profile Files
GRID
[grid@rac02 ~]$ cat .bash_profile
# .bash_profile

# Get the aliases and functions
if [ -f ~/.bashrc ]; then
        . ~/.bashrc
fi

# User specific environment and startup programs

PATH=$PATH:$HOME/bin

export PATH

# Grid Settings

TMP=/tmp;export TMP
TMPDIR=$TMP;export TMPDIR

ORACLE_HOSTNAME=rac02.testserver.com;export ORACLE_HOSTNAME
ORACLE_UNQNAME=RAC;export ORACLE_UNQNAME
ORACLE_BASE=/u01/app/grid;export ORACLE_BASE
ORACLE_HOME=/u01/app/12.1.0.2/grid;export ORACLE_HOME
ORACLE_SID=+ASM2;export ORACLE_SID
ORACLE_TERM=xterm;export ORACLE_TERM
BASE_PATH=/usr/sbin:$PATH;export BASE_PATH
PATH=$ORACLE_HOME/bin:$BASE_PATH;export PATH

LD_LIBRARY_PATH=$ORACLE_HOME/lib:/lib:/usr/lib; export LD_LIBRARY_PATH
CLASSPATH=$ORACLE_HOME/JRE:$ORACLE_HOME/jlib:$ORACLE_HOME/rdbms/jlib;export CLASSPATH
ORACLE
[oracle@rac02 ~]$ cat .bash_profile
# .bash_profile

# Get the aliases and functions
if [ -f ~/.bashrc ]; then
        . ~/.bashrc
fi

# User specific environment and startup programs

PATH=$PATH:$HOME/bin

export PATH

# Oracle Settings

TMP=/tmp;export TMP
TMPDIR=$TMP;export TMPDIR

ORACLE_HOSTNAME=rac02.testserver.com;export ORACLE_HOSTNAME
ORACLE_UNQNAME=RAC;export ORACLE_UNQNAME
ORACLE_BASE=/u02/app/oracle;export ORACLE_BASE
ORACLE_HOME=/u02/app/oracle/product/12.1.0.2/db_home;export ORACLE_HOME
ORACLE_SID=RAC2;export ORACLE_SID
ORACLE_TERM=xterm;export ORACLE_TERM
BASE_PATH=/usr/sbin:$PATH;export BASE_PATH
PATH=$ORACLE_HOME/bin:$BASE_PATH;export PATH

LD_LIBRARY_PATH=$ORACLE_HOME/lib:/lib:/usr/lib; export LD_LIBRARY_PATH
CLASSPATH=$ORACLE_HOME/JRE:$ORACLE_HOME/jlib:$ORACLE_HOME/rdbms/jlib;export CLASSPATH
CREATING THE SHARED DISKS
The table below shows the minimum disk size requirements for the OCR and VOTING disks. In this tutorial we are going to install 2 nodes and use external redundancy. External redundancy means, for the data redundancy we are going to rely on some other external mechanism which is usually the RAID. Not only for test or demo installations (like this tutorial) but also for production environments, external redundancy is often preferred. This is a very detailed subject including modern storage arrays, sequential SAS vs SSD devices, whether to multiplex some files or not,storage pools etc… which is obviously beyond the scope of this tutorial.
Long story short, we are going to use external redundancy for a 2 node RAC. Therefore, 6GB seems to be sufficient, but just to be on the safe side, I am going to allocate 8GB for only the OCR and VOTING purpose.

Shutdown both nodes and perform the following disk operations on one of the nodes on virtual server gui.
On the RAC01 Settings:


Create the following disks as we did above:
| DISK GROUP | FILE NAME | CAPACITY |
|---|---|---|
| +OCRVOTING | disk_ocrvoting | 8GB |
| +DATA | disk_data_01 | 10GB |
| +RECO | disk_reco_01 | 10GB |
After all disks are created, we need to make them shareable and then attach to both servers:


Start either of the machines and log in as root.
Partition the following disks sdb, sdc and sdd but DO NOT format them.
[root@rac01 ~]> ls -la /dev/sd*

brw-rw----. 1 root disk 8,  0 Dec 26 12:42 /dev/sda
brw-rw----. 1 root disk 8,  1 Dec 26 12:42 /dev/sda1
brw-rw----. 1 root disk 8,  2 Dec 26 12:42 /dev/sda2
brw-rw----. 1 root disk 8, 16 Dec 26 12:42 /dev/sdb
brw-rw----. 1 root disk 8, 32 Dec 26 12:42 /dev/sdc
brw-rw----. 1 root disk 8, 48 Dec 26 12:42 /dev/sdd

[root@rac01 ~]> fdisk /dev/sdb

Device contains neither a valid DOS partition table, nor Sun, SGI or OSF disklabel
Building a new DOS disklabel with disk identifier 0xed6f38e7.
Changes will remain in memory only, until you decide to write them.
After that, of course, the previous content won't be recoverable.

Warning: invalid flag 0x0000 of partition table 4 will be corrected by w(rite)

WARNING: DOS-compatible mode is deprecated. It's strongly recommended to
         switch off the mode (command 'c') and change display units to
         sectors (command 'u').

Command (m for help): n
Command action
   e   extended
   p   primary partition (1-4)
p
Partition number (1-4): 1
First cylinder (1-1044, default 1):
Using default value 1
Last cylinder, +cylinders or +size{K,M,G} (1-1044, default 1044):
Using default value 1044

Command (m for help): w
The partition table has been altered!

Calling ioctl() to re-read partition table.
Syncing disks.
The sequence of answers is “n”, “p”, “1”, “Return”, “Return” and “w”.
The disks should look like this
[root@rac01 ~]> ls -la /dev/sd*

brw-rw----. 1 root disk 8,  0 Dec 26 12:42 /dev/sda
brw-rw----. 1 root disk 8,  1 Dec 26 12:42 /dev/sda1
brw-rw----. 1 root disk 8,  2 Dec 26 12:42 /dev/sda2
brw-rw----. 1 root disk 8, 16 Dec 26 13:03 /dev/sdb
brw-rw----. 1 root disk 8, 17 Dec 26 13:03 /dev/sdb1
brw-rw----. 1 root disk 8, 32 Dec 26 13:08 /dev/sdc
brw-rw----. 1 root disk 8, 33 Dec 26 13:08 /dev/sdc1
brw-rw----. 1 root disk 8, 48 Dec 26 13:08 /dev/sdd
brw-rw----. 1 root disk 8, 49 Dec 26 13:08 /dev/sdd1
UDEV Configuration
ON NODE 1
Edit the file /etc/scsi_id.config and add this line:
options=-g
Get the scsi ids of the disks
[root@rac01 ~]> /sbin/scsi_id -g -u -d /dev/sdb
1ATA_VBOX_HARDDISK_VB71725e82-baa54082

[root@rac01 ~]> /sbin/scsi_id -g -u -d /dev/sdc
1ATA_VBOX_HARDDISK_VB105ac7b7-71b8ed97

[root@rac01 ~]> /sbin/scsi_id -g -u -d /dev/sdd
1ATA_VBOX_HARDDISK_VB0805b275-9275035b
Using these values, edit the “/etc/udev/rules.d/99-oracle-asmdevices.rules” file
KERNEL=="sd?1", BUS=="scsi", PROGRAM=="/sbin/scsi_id -g -u -d /dev/$parent", RESULT=="1ATA_VBOX_HARDDISK_VB71725e82-baa54082", NAME="asmdisk_ocr",  OWNER="grid", GROUP="oinstall", MODE="0660"
KERNEL=="sd?1", BUS=="scsi", PROGRAM=="/sbin/scsi_id -g -u -d /dev/$parent", RESULT=="1ATA_VBOX_HARDDISK_VB105ac7b7-71b8ed97", NAME="asmdisk_data", OWNER="grid", GROUP="oinstall", MODE="0660"
KERNEL=="sd?1", BUS=="scsi", PROGRAM=="/sbin/scsi_id -g -u -d /dev/$parent", RESULT=="1ATA_VBOX_HARDDISK_VB0805b275-9275035b", NAME="asmdisk_reco", OWNER="grid", GROUP="oinstall", MODE="0660"
Test -> it should not say something like: unable to open device
[root@rac01 ~]> /sbin/udevadm test /block/sdb/sdb1
[root@rac01 ~]> /sbin/udevadm test /block/sdc/sdc1
[root@rac01 ~]> /sbin/udevadm test /block/sdd/sdd1
Reload the UDEV rules and start UDEV
[root@rac01 ~]> /sbin/udevadm control --reload-rules
[root@rac01 ~]> /sbin/start_udev
The disks should now be visible and have the correct ownership using the following command.
[root@rac01 ~]> ls -al /dev/asm*

brw-rw----. 1 grid oinstall 8, 33 Dec 26 13:48 /dev/asmdisk_data
brw-rw----. 1 grid oinstall 8, 17 Dec 26 13:48 /dev/asmdisk_ocr
brw-rw----. 1 grid oinstall 8, 49 Dec 26 13:48 /dev/asmdisk_reco
ON NODE 2
Start the Node2 and do the following tasks on Node2
Edit the file /etc/scsi_id.config and add this line:
options=-g
Edit the “/etc/udev/rules.d/99-oracle-asmdevices.rules” file
KERNEL=="sd?1", BUS=="scsi", PROGRAM=="/sbin/scsi_id -g -u -d /dev/$parent", RESULT=="1ATA_VBOX_HARDDISK_VB71725e82-baa54082", NAME="asmdisk_ocr",  OWNER="grid", GROUP="oinstall", MODE="0660"
KERNEL=="sd?1", BUS=="scsi", PROGRAM=="/sbin/scsi_id -g -u -d /dev/$parent", RESULT=="1ATA_VBOX_HARDDISK_VB105ac7b7-71b8ed97", NAME="asmdisk_data", OWNER="grid", GROUP="oinstall", MODE="0660"
KERNEL=="sd?1", BUS=="scsi", PROGRAM=="/sbin/scsi_id -g -u -d /dev/$parent", RESULT=="1ATA_VBOX_HARDDISK_VB0805b275-9275035b", NAME="asmdisk_reco", OWNER="grid", GROUP="oinstall", MODE="0660"
Test -> it should not say something like: unable to open device
[root@rac02 ~]> /sbin/udevadm test /block/sdb/sdb1
[root@rac02 ~]> /sbin/udevadm test /block/sdc/sdc1
[root@rac02 ~]> /sbin/udevadm test /block/sdd/sdd1
Reload the UDEV rules and start UDEV
[root@rac01 ~]> /sbin/udevadm control --reload-rules
[root@rac02 ~]> /sbin/start_udev
INSTALL THE GRID SOFTWARE
Provide SSH connectivity [ROOT]
Go to the grid installation files path grid/sshsetup and run the ssh setup script (On RAC01)
[root@rac01]> cd /setup/grid/sshsetup

[root@rac01 sshsetup]> ./sshUserSetup.sh -user oracle -hosts "rac01 rac02" -advanced -exverify -confirm
[root@rac01 sshsetup]> ./sshUserSetup.sh -user grid -hosts "rac01 rac02" -advanced -exverify -confirm
Verify the cluster structure before the installation [GRID]
[root@rac01]> su - grid
[root@rac01]> cd /setup/grid
[root@rac01]> ./runcluvfy.sh stage -pre crsinst  -n rac01,rac02  -verbose > result.txt
If you get the following error:
ERROR:

PRVE-0426 : The size of in-memory file system mounted as /dev/shm is "1002" megabytes which is less than the required size of "2048" megabytes on node ""
PRVE-0426 : The size of in-memory file system mounted as /dev/shm is "1002" megabytes which is less than the required size of "2048" megabytes on node ""
Do the following on both nodes:
[root@rac01]> umount /dev/shm
[root@rac01]> fuser -km /dev/shm
[root@rac01]> umount /dev/shm
Edit the /etc/fstab file and modify the line as below by appending ,size=3G
tmpfs /dev/shm tmpfs defaults,size=3G 0 0
then mount again
[root@rac01]> mount /dev/shm
Other than that, examine the output file “result.txt”, at the end of the file we should see the phrase:
Pre-check for cluster services setup was successful.
[root@rac01]> su - grid
[root@rac01]> cd /setup/grid/
[root@rac01]> ./runInstaller
Note: Before being able to run GUI, you should run the XMing software and the putty settings should be configured to forward the X11.
Putty Configuration > Connection > SSH > X11 —> “Enable X11 forwarding”


INSTALL THE DATABASE SOFTWARE
Create ASM disks for +DATA and +RECO
[grid@rac01 ~]$ asmca


Now, we can unzip and start the installation of the database software:
[oracle@rac01 ~]$ cd /setup

[oracle@rac01 setup]$ unzip linuxamd64_12102_database_1of2.zip
[oracle@rac01 setup]$ unzip linuxamd64_12102_database_2of2.zip
[oracle@rac01 setup]$ cd database
[oracle@rac01 database]$ ./runInstaller


CREATE A DATABASE
[oracle@rac01 database]$ dbca


Later on, we can use the disk group +RECO when we configure the archivelog.
Wow!! It has been a long post and it is over 🙂
Have Fun!
